 Chinese Knot Guide
Chinese Flat Knot Tutorial: Alternating Half-Knots and Tension
The Chinese flat knot is built from two mirrored half-knots around one or more carrier cords. Its logic is simple, but the band stays flat only when the working side alternates and the tension remains even.
Quick Answer: To tie a flat knot, place a working cord on each side of the carrier cords, complete one half-knot from the left, then mirror the path from the right. Tighten both halves evenly against the carriers. Repeating the same starting side creates a spiral; alternating sides creates the flat band described here.
Quick facts for this flat-knot method
- Method
- Two mirrored half-knots around carrier cords
- Materials
- One working end begins on each side of stable carriers
- Practice step
- Alternate the starting side after each half-knot
- Common mistake
- Repeating one starting side makes the work twist
- Tension boundary
- Snug each half evenly without crushing the carriers
This page teaches one common alternating flat-knot method. Cord length and finished scale depend on the material, number of carriers, and project.
Set two working ends around stable carrier cords
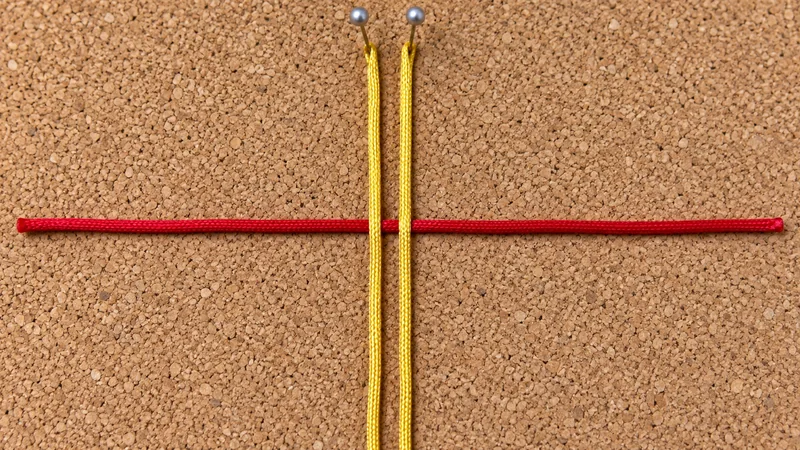
Use one or more straight carrier cords in the center and a separate working cord whose ends extend to the left and right. Pin or tape only the carrier area above the first knot. The working ends must remain free enough to cross around the carriers.
The University of Strathclyde's Chinese knotting classroom account describes a short cord held as the center and a longer cord placed horizontally beneath it. That source provides a practical two-part setup; your project may use several carrier cords instead of one.
Choose a cord that bends cleanly without immediately collapsing. Cut a generous practice length rather than promising an exact ratio. Different diameters, finishes, and knot counts consume different amounts.
Make the first half-knot from the left
Bring the left working end across the front of the carrier cords, leaving a loop on the left. Lead the right working end over the left end, behind the carrier cords, and forward through the left loop.
The step sequence on Chinese Knotting's flat-knot guide describes the same over-carriers and under-carriers relationship. Keep the paths visible until the right end has emerged through the loop. The linked source supplies the controlling over-under sequence. This page does not claim that its author independently test-tied the sample.
Pull both working ends outward at the same pace. Slide the half-knot upward to the starting point, then stop when it is snug. If one side is pulled hard first, the center can shift and the band will begin unevenly.
Mirror the path from the right to complete one flat knot
Now reverse the geometry. Bring the right working end across the front of the carriers, leaving a loop on the right. Lead the left working end over that right end, behind the carriers, and forward through the right loop.
Tighten both ends evenly. The two half-knots should nest as a balanced pair. Look at the edges: each side should show one outward loop and the carriers should remain centered.
This side change is the decisive step. If you start from the left again instead of mirroring from the right, the repeated half-knots will form a spiral rather than the flat band taught on this page.
Repeat the pair while checking width and center
For the next unit, repeat the left-start half and then the right-start half. Work one complete pair at a time. Count complete pairs rather than individual pulls so you do not lose the alternating rhythm.
After every two or three pairs, lay the sample flat. Compare its left and right edges and check whether the carriers still run through the center. Feed a small amount of slack back into an overly tight side instead of yanking the opposite end.
Keep the working ends separated on the table. Crossing them behind the work between steps can make the next path appear correct from the front while adding an unwanted twist.
Diagnose a spiral, a bulge, or drifting carriers
A consistent spiral usually means the same side started every half-knot. Loosen back to the last balanced pair and resume with the opposite side. Do not flatten a spiral by force; correct the sequence.
A bulge on one edge usually means unequal tightening. Open only the most recent pair, align the carriers, and draw both ends outward together. If the whole sample narrows and widens, use the previous completed pair as the width reference.
For material choice, compare the Chinese knotting cord guide. For shaping after the path is correct, use the knot-tightening guide. The snake knot tutorial is a separate two-cord structure and should not be substituted for this alternating flat-knot path.
Flat knot sequence at a glance
| Stage | Working path | Check before continuing |
|---|---|---|
| Setup | Working ends left and right of centered carriers | Carriers fixed; ends free |
| Left half | Left over carriers; right behind and through left loop | Both ends emerge cleanly |
| Right half | Right over carriers; left behind and through right loop | Pair is mirrored and centered |
| Repeat | Alternate left and right starts | Band stays flat, not spiral |
Treat the two mirrored halves as one complete unit. Stop and loosen the newest unit when the edges stop matching.
Questions about the Chinese flat knot
Why is my flat knot twisting?
The most common cause is starting every half-knot from the same side. Alternate left and right starts to keep the band flat.
How many carrier cords should I use?
This method works around one or more carriers. The project determines the count; use the same count throughout a practice sample.
How tightly should I pull?
Pull until the pair is snug and stable, but not so hard that the carriers bend or the edges pinch.
Is a flat knot the same as a snake knot?
No. They are different cord paths. Follow one named method at a time and do not combine their steps.
How much cord do I need?
There is no universal multiplier. Cord diameter, finish, carrier count, knot count, and desired width all change consumption, so make a sample first.
Method sources and related guides
The linked instructions support the alternating flat-knot path. They do not establish one universal cord length or project size.