 Chinese Knot Guide
How to Tighten a Chinese Knot Without Distorting the Pattern
Quick Answer: To tighten a Chinese knot, first confirm that every over-under crossing is correct. Then move a small amount of slack from one section to the next, following the same cord route around the design. Stabilize the center before you make the outer loops even. Pulling both ends hard may remove slack quickly, but it can also hide a crossed strand, collapse one loop, or make the whole pattern lean.
Chinese knot tightening facts at a glance
- Main task
- Move slack through the existing cord path without changing the crossing order
- Best starting state
- A fully formed but still loose knot with every over-under crossing visible
- Working method
- Tighten in small circuits instead of pulling one tail hard
- Stop condition
- Pause when a crossing twists, disappears, or starts borrowing slack from the wrong loop
- Scope
- A general dressing workflow; each knot variation still needs its own tying diagram or demonstration
Tightening is the finishing stage after the cord path has been woven. It is sometimes called dressing a knot: the structure already exists, but its slack, crossings, loops, and outline still need to be arranged. That task is different from tying the knot and different again from testing whether a finished object is strong enough for a particular use.
A useful tightening guide must therefore begin with limits. Chinese decorative knots do not all share one path. A button knot, double connection knot, good-luck knot, and multi-return Pan Chang knot place their crossings differently. The button-knot and double-connection demonstrations in the references show separate routes and separate tightening stages. Use a diagram or demonstration for the exact knot in front of you; use the workflow below to control slack after that route is correct.
Work on a flat, well-lit surface. Keep fingers away from sharp pins, use only a blunt awl or smooth tweezers when a crossing is hard to reach, and stop if a tool begins to split or scrape the cord. This article does not treat decorative knotwork as a load-bearing or safety-critical fastening.
Step 1: stop and map the knot before pulling
Do not begin with the two tails. Begin with the center. Spread the knot gently until each crossing is visible, then trace one cord with a fingertip from its entry point through the center and back toward an outer loop or tail. At every crossing, say what the cord does: over, under, around, or through. If the route cannot be followed without guessing, the knot is not ready to tighten.
Compare the front of the work with the exact pattern or demonstration you used. Count the loops and check their direction. Look for one strand that twists onto its edge, passes over when the model passes under, or disappears beneath a neighboring section. A wrong crossing may look harmless while the knot is loose. Once tightened, it can lock the wrong section in place.
Mark a starting point that still moves freely. It might be a loose center segment, an outer ear, or a tail near the final crossing. The correct starting point varies with the knot, so the goal is not to memorize one universal location. The goal is to know which connected section will receive the slack next.
Leave generous slack while mapping. The Search Press Celtic-knot project sequence illustrates the useful principle: a loop is enlarged and then that slack is moved farther through the design, while gradual adjustment keeps the structure aligned. A loose knot may look untidy, but it is still repairable. A prematurely locked knot is much harder to correct.
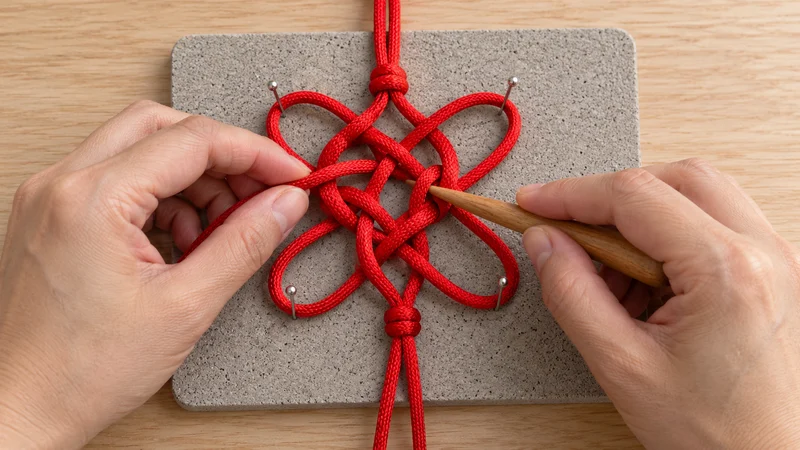
Step 2: move slack through one continuous circuit
Pinch a short section of cord and pull only enough to reduce one local gap. Watch where the neighboring section grows. That growth is not a new error; it is the same slack arriving at the next part of the cord path. Move to that section and repeat. Continue in one direction until you reach the next outer loop, working tail, or another chosen boundary.
Think in circuits rather than isolated pulls. If a design has a woven center and four outer loops, one circuit may tighten several center crossings while temporarily enlarging the loops. A second circuit can make the center firmer. Only after the center holds its geometry should the outer loops be reduced to their final size.
Keep each movement small enough to reverse. A one-centimeter change in a large loose loop can be easier to manage than a hard pull at a tail. If the cord is glossy or springy, hold the section you have just adjusted while you move the next one. If it is soft, support the center so the pattern does not fold over itself.
The references do not prove that every Chinese knot uses the same sequence. In fact, their value is the opposite: the button-knot and double-connection examples visibly use different structures. What carries across them is the need to respect the existing path and to tighten in stages.
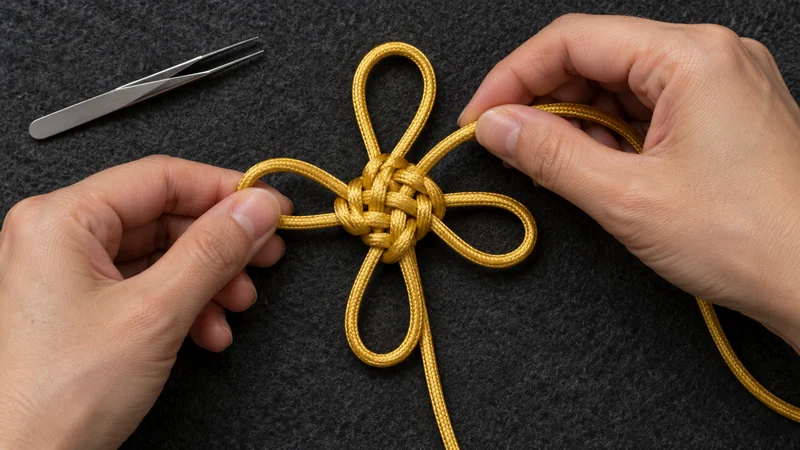
Step 3: keep the crossing order unchanged
As slack moves, inspect the crossings again. The strand that was on top before tightening should still be on top afterward unless the selected knot method explicitly changes that arrangement. A cord can roll, flatten, or twist while it slides. Correct that rotation before the next pull.
Use a blunt point to lift a crossing only enough to see the moving strand. Do not pry a tight center open with force. Metal pliers can crush satin cord, mark soft fibers, or create a sharp bend, so bare jaws are a poor default. Smooth tweezers may help with a small loop when used gently, but fingers give better feedback about friction and resistance.
Stop when resistance changes suddenly. The cord may have reached the end of the available slack, caught on a pin, folded beneath the work, or locked against a mistaken crossing. More force does not answer which problem occurred. Reopen the last section, restore visible space, and trace the path again.
For a knot with two faces, turn it over before the center becomes firm. The front may look orderly while the back contains a twisted return. Correcting that return early preserves the intended shape without stretching one loop out of proportion.
Step 4: balance the outer loops after the center is stable
Once the center crossings sit flat and no section moves unexpectedly, compare the outer loops. Choose one pair that should match and adjust them alternately. Reduce the left loop a little, move the released slack through the center, then reduce the corresponding right loop. Repeat rather than trying to finish one side in a single pull.
Judge balance from the knot's intended orientation. A hanging knot may need a longer top loop and shorter side ears. A button knot may need a compact round form rather than a flat square. Symmetry is not always identical loop size; it is a controlled relationship between the parts specified by that knot or project.
Lay the work flat and step back. Check whether the center is level, whether paired loops leave the center at comparable angles, and whether the tails hang without twisting. Turn the knot over and repeat the inspection. If the back is noticeably tighter than the front, move a small amount of slack through the relevant return instead of pressing the knot flat and hoping it stays.
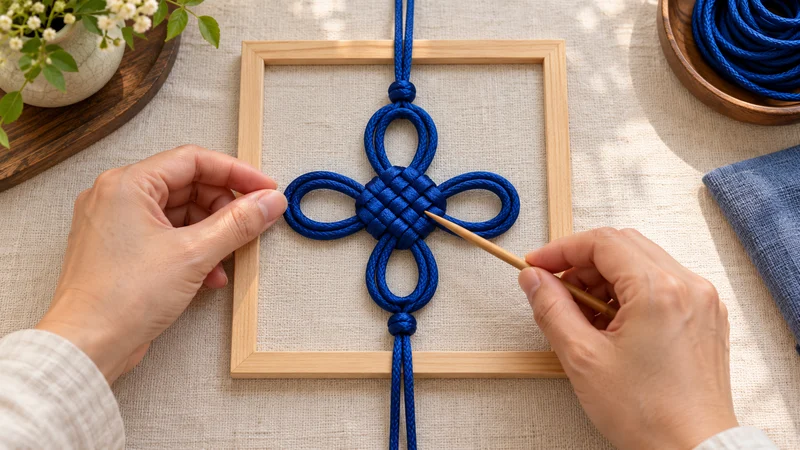
The final outline should come from the cord path, not from stretching the whole piece against a frame. The frame shown in the accompanying scene is only a visual comparison aid. It does not prove a standard size or supply a full-scale pattern.
Step 5: diagnose a twisted, lopsided, or locked knot
One loop keeps shrinking. You may be pulling slack out of that loop faster than you move it onward. Enlarge it slightly, find the next connected section, and resume with smaller changes.
The center leans to one side. Compare the number and angle of visible crossings on both sides. A twisted cord, skipped return, or one fully tightened path beside a loose path can create the lean. Reopen the most recent circuit rather than compensating by stretching the opposite outer loop.
A crossing will not move. Check for a hidden twist, pin, frayed fiber, or an adjacent section already pulled tight. Do not force a tool under the crossing. If the route is correct but friction is high, loosen the sections before and after it and distribute the bend over more cord.
The knot looks right on the front but untidy on the back. The return path may have rolled or crossed. Open the center enough to correct the back. Decorative cord does not become structurally correct merely because the front covers the problem.
The cord surface is damaged. Stop. Repeated scraping can weaken fibers and make a polished cord look fuzzy. Decide whether the affected piece should be replaced. This guide cannot establish the safety or durability of damaged cord.
Quick reference: tighten, inspect, and stop
- Confirm the exact knot variation and compare its loose route with a reliable diagram or demonstration.
- Spread the knot until every over-under crossing can be traced.
- Choose one movable section and identify where its slack should go next.
- Move a small amount of slack through one continuous circuit.
- Check both faces and correct twists before the center becomes firm.
- Stabilize the center, then balance paired outer loops in alternating steps.
- Stop and reopen the last section if resistance changes, a crossing disappears, or one loop borrows slack from the wrong path.
- Finish only when the intended outline is balanced and the cord surface remains undamaged.
For knot-specific routes, use the Chinese button knot tutorial or another pattern that names the exact variation. The Chinese knot pattern guide explains why a clear path matters before tightening.
Questions about tightening Chinese knots
Should I pull both ends to tighten a Chinese knot?
Not as the first move. Confirm the crossing order and move slack through connected sections in small circuits. Pulling both ends hard can lock a mistake or collapse one side before the rest of the cord is balanced.
Why does my Chinese knot become lopsided?
Common causes include tightening one path completely before the opposite path, allowing the cord to twist at a crossing, or changing an outer loop before the center is stable. Reopen the latest adjustments and trace where the slack moved.
Can I use pliers or tweezers to tighten the cord?
Use fingers whenever possible. Smooth tweezers or a blunt awl can help expose a small loop, but sharp or bare metal jaws may crush, scrape, or split decorative cord. Stop if the tool damages the fibers.
Do all Chinese knots tighten in the same order?
No. The exact order depends on the knot and variation. A general workflow can help control slack, but the tying diagram or demonstration for that specific knot determines the actual route.
When should I undo the knot and start again?
Undo or reopen it when the cord path cannot be traced, an over-under crossing is wrong, a hidden twist is locked in the center, or the cord is damaged. Adding force to an uncertain structure usually makes correction harder.