 Chinese Knot Guide
1.5 mm Chinese Knotting Cord: Project Fit and Sample Tests
A diameter label helps narrow the choices, but the finished knot depends on braid, stiffness, coating, hardware, and tightening.
Quick Answer: Treat 1.5 mm as a nominal size, then test the exact cord in the exact knot. Check whether it bends through the smallest curve, fills bead or ring openings without forcing, produces acceptable knot bulk, moves slack smoothly, and accepts the planned finish. A short sample is more useful than assuming every cord labeled 1.5 mm behaves alike.
What the 1.5 mm label can and cannot tell you
- Nominal diameter
- A starting measurement, not a complete performance specification
- Best first test
- Tie the densest part of the planned knot and reopen it once
- Hardware check
- Test every bead, ring, loop, and repeated cord pass
- Bracelet check
- Inspect bend, skin comfort, closure bulk, and tail finish
- Visual scale
- Medium cord can show a path clearly but may enlarge compact knots
- Buying limit
- Do not order a large spool before sampling the exact product
Begin with a real diameter check
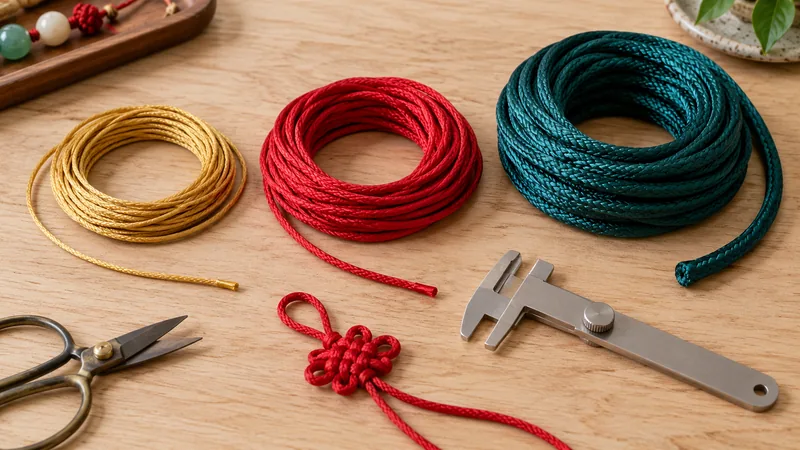
The phrase 1.5 mm Chinese knotting cord usually describes the seller's nominal diameter. That number is useful for comparing listings, but soft braided cord can compress under a measuring tool, coatings can change the surface, and the braid may vary slightly along a length. Use the label as a starting point, not as proof that every section is exactly the same.
Measure a relaxed, unknotted section at several points without crushing it. If the cord is oval rather than round, record both orientations. The National Institute of Standards and Technology explains the metric length relationship of 10 millimeters to 1 centimeter; for craft work, keep the original millimeter measurement instead of rounding it into a vague “medium” category.
Then place the cord beside the fine or thick cord already used in your project. The comparison should answer a practical question: does the new cord create the intended visual weight, or does it make the knot look crowded?
Test the smallest curve before the largest knot
A cord can look flexible on the spool yet resist the tight turn inside a compact button knot, closure, or charm loop. Cut a short sample and form the smallest bend required by the design. Watch for flattening, visible gaps in the braid, spring-back, or a hard crease.
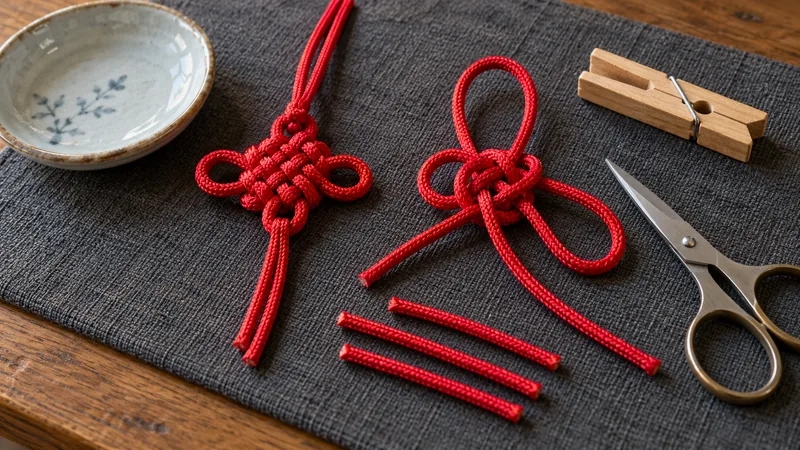
Next, tie only the densest section of the pattern. Leave it loose enough to trace each crossing, then move slack through the form in stages. If 1.5 mm cord makes the crossings stack instead of lying beside one another, the design may need more space or a finer cord. If the path remains readable and the shape holds without excessive force, the size may be useful for practice, keychains, pendants, or larger bracelet details.
The cord thickness guide compares broad project scales. The 1.4 mm cord guide is a close neighboring reference, but a tenth of a millimeter on a label is less important than how the exact braid behaves in the actual knot.
Match bead holes, rings, and charm loops by repeated passes
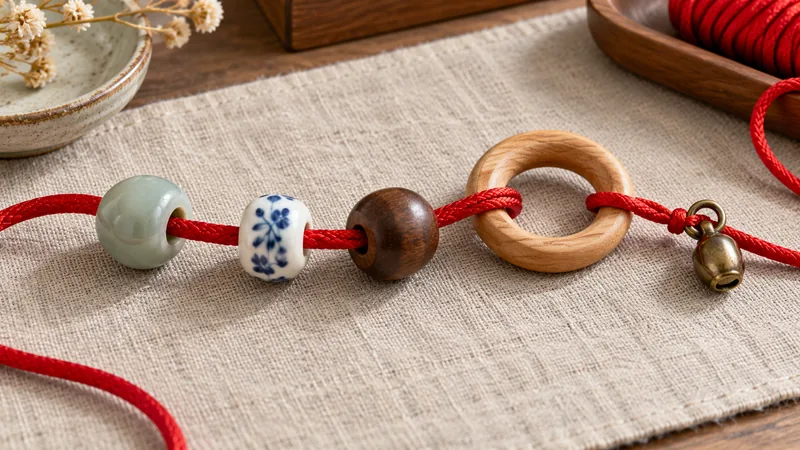
Do not compare cord diameter with a bead-hole listing only on paper. The cut end may flare, a coating may catch, and a knot may require the cord to pass through an opening twice. Test the exact bead, ring, or charm loop with the exact finishing method you plan to use.
A comfortable fit should slide without crushing the braid or forcing the hardware. If the first pass barely fits, a return pass, folded end, or doubled attachment probably will not. If the hole is much larger, the bead may tilt or expose a gap unless a stopper knot or smaller connector is part of the design.
For a ring, check both clearance and movement. The cord should wrap the ring without a sharp kink, while the completed attachment should not rotate into an awkward position. Pull gently in the directions the object will experience during use, then release it and inspect whether the knot recenters.
Decide by the finished object, not the spool
For a bracelet, 1.5 mm cord can give a visible braid and substantial knot, but dense sections and closures may become bulky. Make a short wearable sample that includes the closure. Bend it repeatedly, check whether the knot presses into skin, and confirm that tails or sealed ends do not create a sharp spot.
For a keychain or bag charm, test the ring attachment and the way the cord handles twisting. The project may benefit from a fuller cord, but decorative braid is not automatically load-rated. Keep the use light unless the product specification supports more.
For hanging ornaments, view the sample vertically. Medium cord may hold a clear outline in a compact ornament, yet a long tassel or heavy bead can pull the center out of balance. Build the knot, lower attachment, and suspension loop as one system. The cord project guide compares these different use cases without pretending one size works everywhere.
Tighten in stages and choose a finish the cord can accept
Do not pull one tail until the whole knot looks tight. Move slack through mirrored or neighboring sections a little at a time. This protects the braid from abrasion and helps keep loops even. If the cord twists, flatten and realign it before the next pull rather than locking the twist into the center.
Reopen the test knot once. A reusable practice cord should loosen without severe fuzzing, color loss, or permanent kinks. A cord intended only for a final piece may tolerate less reopening, but you still need enough control to correct the path.
Finish according to the material and maker's instructions. A hidden sewn capture, wrapped binding, knot, or suitable adhesive can be appropriate in different projects. Heat treatment is not universal and can create burns, fumes, hard edges, or damaged color. Do not apply a flame merely because the cord looks synthetic.
A five-part sample test for 1.5 mm cord
| Test | Pass signal | Reason to reconsider |
|---|---|---|
| Measure relaxed cord | Several points are close to the nominal size | Large variation or heavy flattening |
| Form the smallest bend | Braid follows the curve without damage | Spring-back, gaps, or a hard crease |
| Tie the densest section | Crossings lie clearly and slack moves | Stacked crossings or forced tightening |
| Fit all hardware | Every intended pass clears comfortably | Fraying, crushing, or forced insertion |
| Finish and reopen | Ends can be secured and the sample remains usable | Sharp finish, severe fuzzing, or permanent kink |
Keep the sample with a note naming the cord, stated diameter, knot, hardware, and date. That small record is more useful than relying on memory when two red cords look alike.
Questions about 1.5 mm Chinese knotting cord
Is 1.5 mm cord beginner friendly?
It can be easier to see and handle than very fine cord, but stiffness and surface grip vary. Tie and reopen one small sample before choosing it for a full project.
Will 1.5 mm cord fit beads?
Only if the actual cord end passes through the actual bead hole without crushing, fraying, or forcing. Test the intended number of passes because a return path needs more clearance.
Can 1.5 mm cord be used for bracelets?
Yes for some designs, but test the finished knot bulk, skin comfort, bend, and closure before cutting all pieces. Dense knots can become larger than the loose cord suggests.
How should I measure cord thickness?
Use the maker's nominal size as a starting point, then measure an uncompressed section with an appropriate metric tool and compare several places. Avoid flattening soft cord while measuring.
How much cord should I buy?
Measure a sample made with the same cord and knot, then add allowance for tightening, tails, hardware, and one correction. A universal multiplier cannot account for every knot and tension.
Measurement reference and related cord guides
- NIST: SI Units - LengthMetric length relationships and measurement resources used for the millimeter reference.
- Chinese knotting cord guideMaterial, surface, color, diameter, and project questions for a broader comparison.
- Chinese knotting cord projectsMatch cord behavior to bracelets, keychains, pendants, practice work, and hangings.
The sample method is practical guidance, not a claim that all cords labeled 1.5 mm share one material or performance level.