 Chinese Knot Guide
Chinese Knotting Cord Projects: Match Cord to the Finished Piece
A cord that feels excellent in a compact bracelet can look undersized in a wall hanging. A thick decorative cord that holds an ornament's outline can make a small closure bulky. The useful question is not which cord is universally best, but what the finished object must do.
Quick Answer: Choose the project first. Fine, flexible cord can suit close-wearing pieces and compact detail; a visible medium cord is often easier for practice, pendants, and keychains; larger decorative work needs cord and support scaled to the finished weight. Test a short sample because a diameter label cannot tell you everything about stiffness, friction, memory, or finish.
Six decisions to make before cutting cord
- Project comes first
- Bracelets, keychains, pendants, practice knots, and hangings put different demands on cord.
- Diameter is one variable
- Two cords with the same stated size can bend, grip, and spring back differently.
- Practice needs visibility
- A cord you can see and loosen is more useful than one chosen only for final scale.
- Hardware changes load
- Rings, beads, tassels, and frames affect balance and the way a knot is pulled.
- Sample before cutting
- One small test reveals twist, surface friction, bulk, and finishing behavior.
- History is varied
- Museum records show different materials and constructions, not one universal modern specification.
Choose the finished use before the cord color
Begin with the object's job. A bracelet sits against skin, bends repeatedly, and needs a closure that does not become a hard lump. A keychain is handled, twisted, and pulled around metal hardware. A pendant needs a knot that balances with its bead or charm. A hanging ornament has to hold its outline while carrying its own lower sections, tassel, and any attached pieces.
Those differences matter more than color at the first decision. Color can carry a festive, personal, or decorative association, but it cannot make an unsuitable cord comfortable or stable. Write down the project's approximate size, whether it moves, what it touches, and what it must support. Then compare materials.
Historical objects are useful reminders that knotted work is not one fixed recipe. The Metropolitan Museum of Art records a nineteenth-century Chinese interknotted ornament with knotted silk tassels. The British Museum documents an earlier silk ornamental knot with stitched tassels. These are specific collection records, not proof that every modern project should use silk, tassels, or the same construction.
What diameter, stiffness, and surface change in your hands
Diameter changes visual weight and finished bulk. Fine cord can preserve small detail, but crossings become harder to see and a dense knot may take more patience to loosen. Thicker cord makes the path easier to read, yet the same number of crossings can produce a much larger and stiffer object.
Stiffness affects whether open loops hold their shape during tying. A cord with some body can help a learner see the path on a board. Too much stiffness can make a bracelet or compact pendant resist the curves it needs. Surface friction affects how readily a loop stays put before tightening and how easily slack travels through the knot.
Fiber names provide context but do not settle the choice. The Museum of Fine Arts Boston's CAMEO fiber reference lists different fiber classes and properties. A retail cord adds construction, braid, coating, color treatment, and diameter to that base material. Compare the exact product, not only the word "nylon," "polyester," or "silk" on a listing.
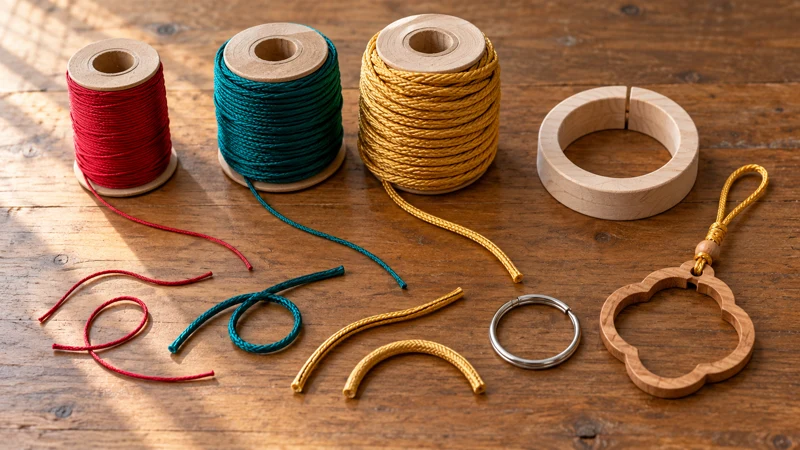
Five project families and the first cord test for each
Practice samplers: choose a cord that is easy to see, reopen, and move through crossings. A medium diameter and contrasting work surface usually teach more than a fine cord that hides the route. The goal is learning the path, not producing a miniature final object on the first attempt.
Bracelets: test comfort, repeated bending, closure bulk, and tail finishing. Wrap the sample around a sizing cylinder or your wrist without tightening it against skin. Check whether the knot presses into one spot and whether the closure still moves after several openings.
Pendants and keychains: test the connection to the ring, bead, or charm. The cord should fill the design without swallowing small hardware. Pull the hardware gently in the directions it will experience during use and watch for uneven distortion at the attachment point.
Hanging ornaments: test the piece vertically. A knot that looks balanced flat on a table can lengthen, twist, or lean when a tassel is added. Scale the central knot, suspension loop, tassel, and support together instead of treating them as separate decorative choices.
Gift or display pieces: test the full visual distance. Fine detail that looks elegant at arm's length may disappear across a room, while oversized cord can overpower a small presentation box. The hanging ornament guide and bracelet size guide separate those two use cases.
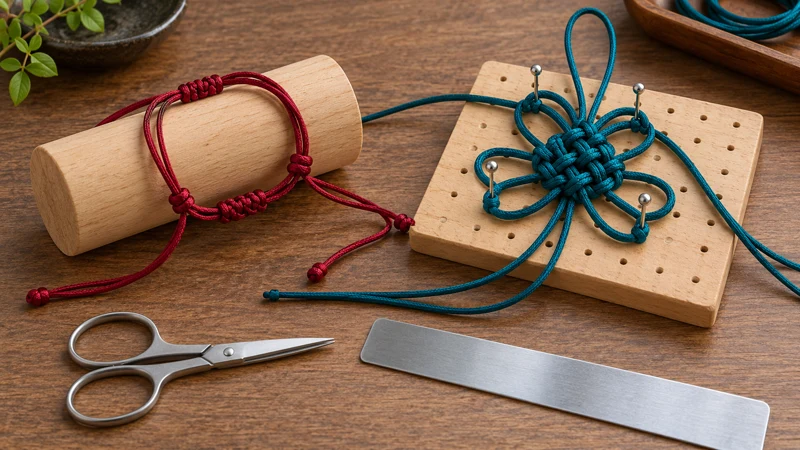
Make a sample that exposes problems before the final piece
Cut a modest test length and tie the densest or most important part of the design. For a bracelet, sample the closure and one decorative repeat. For a keychain, include the metal ring. For a hanging, build enough of the central structure to add a temporary weight where the tassel or lower ornament will sit.
Do not pull the sample tight in one movement. Work around the form and move slack through matching sections. Notice where the cord flattens, twists, slips, or refuses a small curve. Reopen the sample once. If that damages the surface or makes the cord kink permanently, decide whether the final project allows enough room for a first-pass construction.
Measure the cord before and after the sample. That gives you evidence for this knot, this diameter, and your tying tension. It is more dependable than applying a universal length multiplier copied from a different project. The Chinese knotting cord guide covers the broader material checklist, while string for Chinese knots explains why everyday string and purpose-made braided cord can behave differently.
Plan length, finishing, hardware, and display load together
Your measured sample provides a base length, but the final cut also needs working tails, tightening travel, hardware attachment, and a correction allowance. Record each part separately. If one cord end must pass through a bead or ring, confirm that the finished or sealed end still fits before committing the whole project.
Choose a finishing method that matches the material and use. A hidden sewn finish, a controlled stopper knot, and a heat-finished synthetic end are different solutions. Do not apply heat unless the cord maker identifies the fiber and the work area is ventilated and fire-safe. If the material is unknown, use a reversible mechanical finish for the sample and seek product-specific instructions.
Hardware creates concentrated load. A thin metal ring can rub one small part of a cord, while a wide wooden frame spreads contact. Check edges for burrs and make sure the attachment does not force the knot to sit sideways. Decorative meaning does not substitute for this mechanical check, and no knot name promises durability or protection.
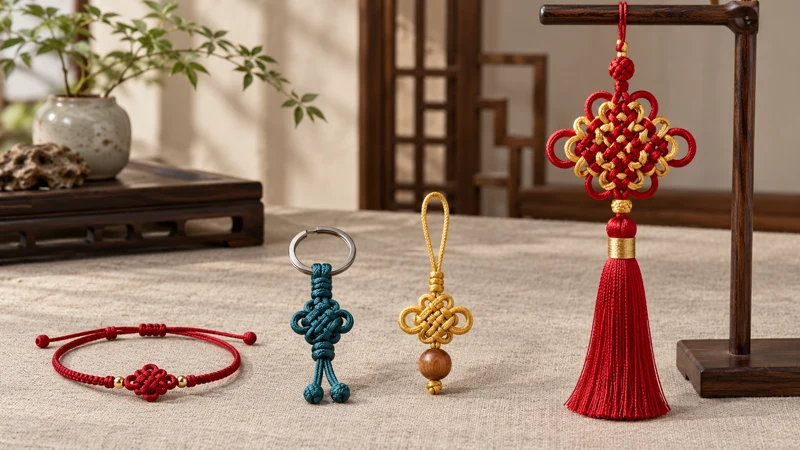
Store leftover cord and finished work without crushing the shape
Keep leftover cord clean, dry, and loosely wound rather than sharply folded. Label the spool or storage card with the supplier's material and diameter information so the next project starts from the actual product record. Save one short tied sample when the cord's handling is hard to describe in words.
Support finished pieces instead of letting heavy parts pull on one loop during storage. The Canadian Conservation Institute's basic textile care guidance emphasizes clean handling, physical support, and avoiding unnecessary folds and pressure. A new craft piece is not automatically a museum object, but those cautious principles are useful when you want tassels, loops, and soft cord surfaces to keep their shape.
Before giving or displaying the piece, inspect the cord where it touches metal, beads, and hanging supports. Retighten only by moving slack through the structure in stages. Pulling one visible loop can make the front look tidy while shifting strain to a hidden crossing.
A project-to-cord checklist for the workbench
- Name the finished object and how it will be worn, handled, hung, or stored.
- Compare diameter, stiffness, surface friction, memory, and finish on the exact cord.
- Include the real ring, bead, closure, tassel, or support in a small sample.
- Tighten in stages and check whether slack moves evenly through matching sections.
- Measure sample consumption, then add separate allowances for tails, hardware, and correction.
- Check comfort for wearables and vertical balance for hanging work.
- Record the product label instead of assuming all cords with the same fiber name behave alike.
- Treat color and symbolism as context, never as a guarantee of luck or performance.
Questions about Chinese knotting cord projects
What cord size is easiest for a first Chinese knot project?
A visible medium cord is usually easier to follow and rebalance than very fine cord, but the best starting size still depends on the knot and finished object. Make one loose practice sample before cutting the final length.
Can the same cord work for a bracelet and a wall hanging?
Sometimes, but the requirements differ. A bracelet needs comfort and movement, while a hanging needs enough visual scale and support for its own weight and attached parts. Test both uses separately.
Is nylon or polyester better for Chinese knotting?
Neither fiber name is an automatic winner. Construction, coating, braid, diameter, stiffness, and surface friction can change how a specific cord behaves, so compare labeled samples in the knot you plan to make.
How much extra cord should I cut?
Use a measured sample of the same knot and cord, then add a practical allowance for tightening, tails, hardware, and one correction. A universal multiplier is unreliable because knot density and cord diameter change consumption.
Why does a finished knot look uneven even when the path is correct?
The two sides may have been tightened in a different order, one loop may hold more slack, or the cord may twist as it moves. Reopen the knot slightly and move slack through matching sections in stages.
References for objects, fibers, and textile care
- The Met: Interknotted Ornament with TasselsNineteenth-century Chinese object record with knotted silk tassels
- British Museum: ornamental knot textileTang-period object record describing silk, knots, and attached tassels
- CAMEO fiber referenceMaterial context for fiber names and properties
- Canadian Conservation Institute: basic textile careHandling, support, and storage principles
The museum records document individual objects. The material and care references provide context; project choices still require testing the exact cord, knot, hardware, and finished use.