 Chinese Knot Guide
5 mm Chinese Knotting Cord: Scale, Fit, and Sample Checks
Five-millimeter cord changes the scale of a knot before it changes its meaning. The useful question is whether the exact cord can make the bends, crossings, and connections your project needs.
Quick Answer: Nominal 5 mm Chinese knotting cord is best treated as thick decorative cord for large, open forms, substantial loops, oversized hardware, or display samples. It may be too bulky for compact button knots, small beads, close bracelet closures, or patterns designed around fine cord. Check the relaxed diameter, narrowest bend, densest crossing, every hardware opening, and one full-size finished sample before cutting multiple pieces.
What changes when the cord is this thick
- Nominal size
- 5 mm is a product label and starting measurement, not a complete material specification
- Visual effect
- Large crossings and loops become prominent, while compact paths can crowd
- First physical check
- Form the smallest curve required by the chosen pattern
- Hardware rule
- Test the actual cord end through every opening and return pass
- Best evidence
- One complete sample made with the same cord, knot, tension, and finish
- Safety boundary
- Decorative appearance does not establish a safe working load
Why 5 mm cord behaves more like small cordage than thread
A five-millimeter strand occupies much more space at every crossing than the fine satin cord often used for jewelry-scale Chinese knots. The Cordage Institute defines cord as a small laid, plaited, or braided item commonly in a 4 mm to 10 mm range. That industrial terminology does not certify a craft product, but it helps explain why a 5 mm material should be evaluated as a substantial structure rather than as thread.
The label alone still does not tell you the fiber, braid, core, coating, softness, stretch, or abrasion behavior. Two products marked 5 mm may make noticeably different bends. Measure a relaxed section at several points without flattening it, then note whether the cross-section stays round or becomes oval. NIST's SI length reference confirms the millimeter relationship, but the practical craft decision comes from the physical sample.
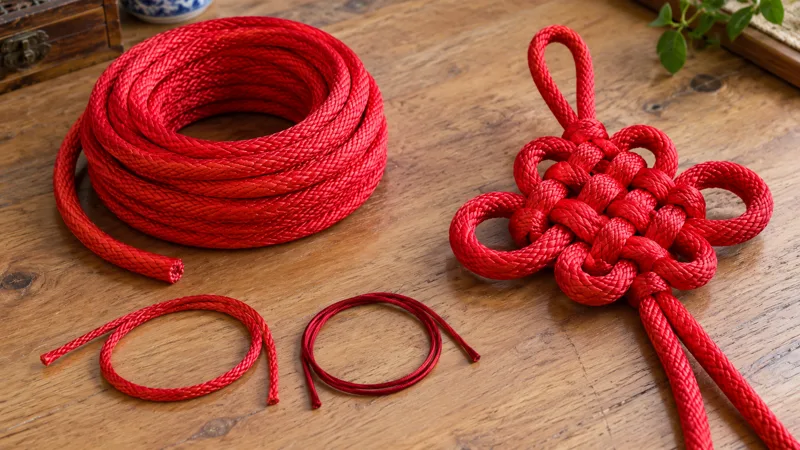
Place the thick cord beside a familiar finer cord and build one crossing. That comparison reveals the real scale change more clearly than a listing photo. If the cord hides adjacent crossings or forces loops outward, the original pattern may need enlargement rather than harder pulling.
Decide whether the project has room for the cord
Start with the object's available space. A wall hanging, large bag charm, teaching sample, or display knot can accommodate broad lobes and visible crossings. A small pendant, close bracelet closure, miniature button knot, or narrow bead may not. This is a fit decision, not a rule that thicker is better or stronger.
Print or draw the intended outline at full size, then lay the cord on top without tightening it. Leave enough room for parallel strands to sit beside one another. At crossings, count how many layers will stack. A route that looks open on paper can become a raised bundle when four or more thick sections meet.
Consider the surroundings as well. A large decorative knot needs room to hang without rubbing a wall edge, zipper, or adjacent ornament. If it will attach to a ring, dowel, or handle, include that object in the mockup. The cord projects guide compares project types.
Test the narrowest bend and every opening
Before tying the whole pattern, make the tightest curve it requires. Let the cord settle naturally around a smooth dowel or ring close to that radius. Look for braid separation, flattening, sharp creases, or strong spring-back. If the curve will not hold without force, enlarge the pattern or choose a more flexible material.
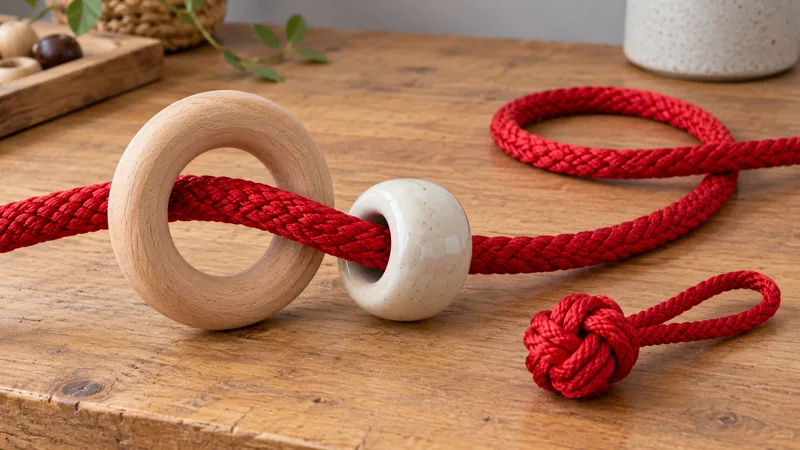
Then test hardware with the actual cut end. Large beads and wooden rings can still fail the fit check if the end flares, the hole has a rough edge, or the path requires two passes. A first pass that only barely clears is not evidence that a folded end or return pass will work. Do not scrape or crush the braid to make it fit.
A hardware opening also affects movement. After passing the cord, rotate and bend the connection in the directions the finished object will experience. The cord should not be pinched against a sharp edge, and the attachment should return to a stable position when released. Replace rough hardware rather than assuming the thick braid will protect itself.
Build one full-size sample before cutting multiples
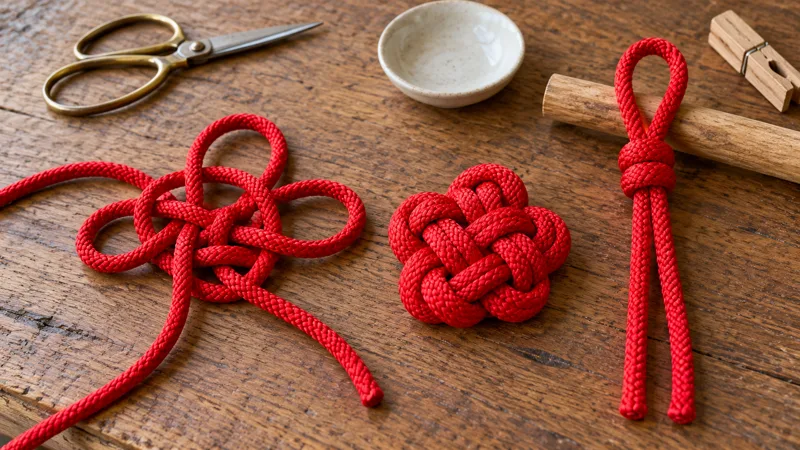
A short bend test cannot predict the final knot's bulk. Tie one complete sample at the intended size. Keep the path open at first so every over-and-under crossing remains visible, then move slack through neighboring sections in stages. Pulling one tail hard can lock an uneven loop or flatten one side of the braid.
Set the finished sample down, hang it, or attach it exactly as the project will be used. Check symmetry, center stability, tail direction, and whether the object twists under its own weight. For a teaching piece, confirm that viewers can still trace the path. For a decorative loop, check that the loop stays open and that the knot below it does not rotate.
Measure the cord consumed by this real sample, including tails and the chosen finish. That is the best basis for cutting repeats. Add a modest correction allowance for tension variation and one mistake; do not rely on a universal length multiplier.
Finish thick cord without creating a hard or sharp end
The correct finish depends on the actual fiber and construction. A sewn capture, wrapped binding, stopper knot, tucked tail, or product-compatible adhesive may suit different projects. Follow the maker's material instructions where available. Do not assume that every shiny red cord is the same synthetic fiber.
Heat sealing is not a universal shortcut. An open flame can burn skin, discolor the braid, create fumes, or leave a hard bead that scratches nearby surfaces. If a manufacturer explicitly permits controlled heat treatment, use appropriate ventilation, tools, and a scrap test; otherwise choose a mechanical finish.
After finishing, flex the sample and inspect the cord around crossings and hardware. Fraying, a sharp end, separated braid, or a connection that slips under gentle handling is a reason to revise the finish. This article evaluates decorative project fit only. It does not establish load capacity, climbing suitability, child safety, or any other safety-critical use.
A project-fit screen for nominal 5 mm cord
| Question | Promising sign | Reason to change course |
|---|---|---|
| Does the pattern have space? | Parallel strands and crossings remain readable | Layers crowd, stack, or hide the path |
| Can it make the tightest bend? | The braid follows the curve without damage | Strong spring-back, flattening, or a hard crease |
| Will hardware accept every pass? | The end and return path clear comfortably | Forcing, scraping, flaring, or pinching |
| Does the complete sample hang correctly? | The center stays stable and loops remain balanced | Twisting, rotation, or uneven weight |
| Can the end be finished cleanly? | The chosen finish is secure and smooth | Sharp bead, fraying, slipping, or uncertain material |
If one test fails, change the pattern scale, hardware, cord construction, or nominal diameter before buying or cutting more material.
Questions about 5 mm Chinese knotting cord
Is 5 mm cord suitable for every Chinese knot?
No. It is thick enough to enlarge compact crossings and may resist tight curves. Use it only when a full-size sample keeps the intended path readable and the finished scale suits the object.
Does a 5 mm label prove the cord is exactly 5 mm everywhere?
No. Treat the listing as a nominal size. Braid, coating, softness, and measuring pressure can affect the observed width, so compare several relaxed sections without crushing them.
Can 5 mm cord pass through beads?
Only through openings that comfortably accept the actual cord end and every planned return pass. Test the exact bead or ring rather than relying on the diameter label alone.
Is thick decorative cord load rated?
Not unless the maker supplies an applicable rating and intended-use specification. A craft sample can show shape and handling, but it does not establish a safe working load.
How much 5 mm cord should I cut?
Tie one complete sample with the same knot, tension, tails, and hardware. Measure that sample and add a correction allowance instead of relying on a universal multiplier.
Measurement and cord terminology references
- NIST: SI Units - LengthMetric length relationships used to keep the diameter discussion in millimeters.
- Cordage Institute terminologyIndustry terminology that places cord in a broader cordage context; it is not a certification of a specific craft product.
- Cordage Institute publications catalogShows that fiber cordage properties and load questions require construction-specific standards rather than visual assumptions.
The page uses a physical sample workflow for craft fit. It makes no claim that all products labeled 5 mm share one material, construction, performance level, or safe working load.