 Chinese Knot Guide
Button Knot with Paracord: Cord Choice, Tightening, and Use
Learn how paracord changes a Chinese button knot, from cord diameter and open-path setup to even tightening and decorative-use limits.
Paracord can make a firm, rounded button knot, but it does not behave like the smoother decorative cord often used for Chinese knotting. Its braided sheath, inner core, and greater diameter make every crossing bulkier. The reliable approach is to tie one loose sample first, keep the path open until every crossing is visible, and then move slack through the knot one segment at a time. Treat the result as a decorative closure, lanyard end, or practice piece, not as life-safety equipment.
Quick answer
For a Spiral Method Chinese Button Knot made with paracord, choose a diameter that suits the finished object and form the entire route loosely. Verify the Carrick Bend stage, then check that both ends pass beneath the knot and rise through the center diamond before tightening in stages. Cord around 4 mm makes a noticeably larger button than 2-3 mm decorative cord. Make a sample before cutting project cord, and keep this decorative knot out of climbing, restraint, lifting, or other safety-critical uses.
Quick facts
- Material behavior
- A braided sheath over an inner core makes paracord round, springy, and comparatively bulky.
- Useful starting size
- 4 mm cord is easy to handle but produces a large decorative button; thinner utility cord gives a smaller result.
- Best tightening method
- After both ends emerge through the center diamond, reduce the finger loop and tails in small passes, then fine-tune adjacent segments while preserving symmetry.
- Good uses
- Practice pieces, zipper pulls, lanyard ends, toggles, and non-load-bearing ornament.
- Important limit
- A decorative button knot is not a certified load-bearing or life-safety knot.
Why paracord changes the knot before you tie it
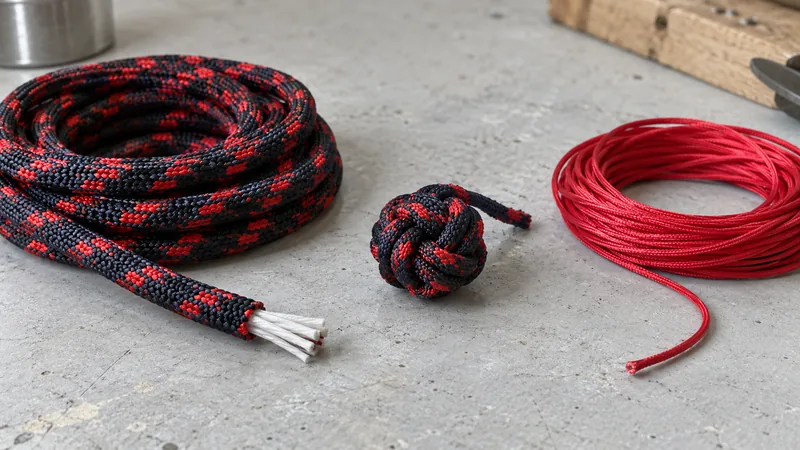
Paracord is a kernmantle-style cord: the outer braid contains an inner core. That construction helps it stay round, but it also creates more volume at every bend. A knot path that looks spacious in thin satin cord can become crowded when tied in 4 mm paracord. The sheath may also grip neighboring turns before the center is fully dressed.
This is why the material decision comes before the tying decision. If the finished knot must pass through a small fabric loop, sit against a narrow zipper, or pair with a compact bead, a full-size 550-style cord may simply be too thick. The issue is not whether the knot can be tied. It is whether the finished button is proportionate to the job.
Choose the finished button size, then choose the cord
Start with the opening or loop that the button must pass through. A practical decorative button should go through that opening without being crushed, then sit securely after the loop relaxes. If you are making a zipper pull or lanyard end, compare the knot with the hardware rather than choosing cord by a strength number alone.
The common “550” label describes a product class, not a universal craft diameter. One manufacturer's 550 paracord example is about 4 mm in diameter with a seven-strand core, while micro and utility cords are much thinner. Brands and constructions vary, so check the actual diameter and make a short sample. Do not assume that two products carrying a similar marketing name will tighten to the same size.
Keeping the core usually gives the roundest, firmest button. Removing the core can make the sheath flatter and smaller, but it also changes the material enough that you should treat it as a different sample. A partly removed or uneven core can create a lopsided knot.
Lay out the Spiral Method path while the cord is still loose
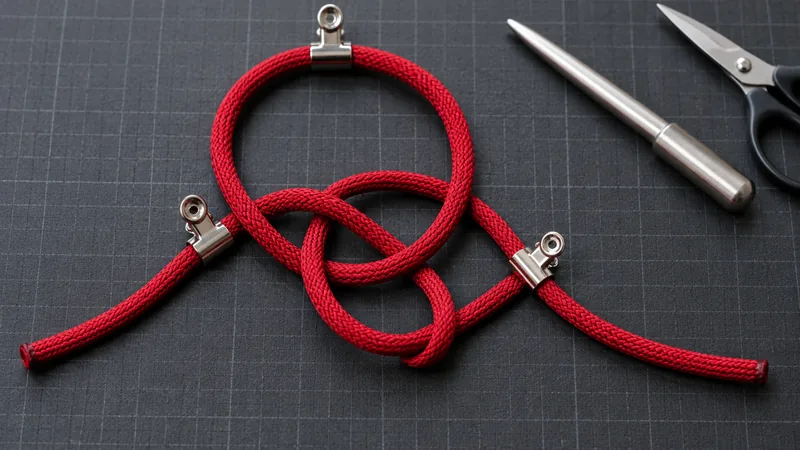
This page adapts Chinese Knotting's Chinese Button Knot—Spiral Method to bulky paracord. Use that source's complete illustrated sequence as the route reference. Begin with the midpoint behind the fingers, fold both ends in one consistent direction, and form the two broad semicircular passes. When each end is taken beneath its own standing part, the loose structure reaches the Carrick Bend landmark.
The next route check is more specific than simply looking for an attractive over-under pattern. Each working end curves toward the opposite side, passes the loop around the fingers, travels underneath the loose knot, and comes up through the center diamond. Only after both ends emerge through that center opening should the route be treated as complete.
Keep every pass open enough to compare it with the specialist diagrams. Do not infer the sequence from the setup photo above, and do not cinch after the first few passes. Thick cord can hide the center route early, making a mistaken crossing difficult to reverse.
How to tighten the Spiral Method in stages
At the end of the route, the source shows a loose disk of cord with both ends through the center diamond. Begin the first tightening stage by reducing the loop around the fingers while drawing on the two ends and supporting the edge of the disk. With springy paracord, make those adjustments in small passes so the sheath does not lock one side before the rest can move.
After the disk starts to close, alternate between the middle loop and the two ends. Then fine-tune the neighboring segments around the knot rather than trying to finish with one hard pull. This keeps the source's staged sequence while allowing the thicker material to settle gradually.
Pause after each pass and rotate the knot. Compare the visible lobes, check that the tails leave the knot evenly, and correct a twist before the cord becomes firm. A blunt fid can help lift a tight strand, but it should not pierce or scrape the sheath.
Match the knot to a decorative job
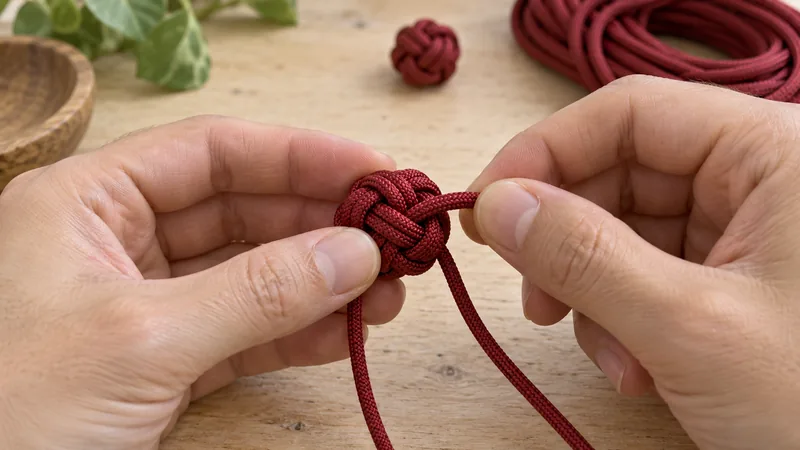
A well-dressed paracord button knot works best where its bulk is useful: at the end of a short lanyard, as a zipper pull, as a decorative toggle, or as a practice knot that can be handled repeatedly. If you need a softer garment closure or a small traditional ornament, smoother and thinner knotting cord is usually a better material match. Our paracord and Chinese knotting comparison explains those broader tradeoffs.
Keep the use claim narrow. A cord's published tensile figure does not turn every knot made from it into safety equipment. Knots and bends reduce rope strength, and a decorative button knot is not a rated connector. Do not use this project for climbing, lifting, towing, restraint, fall protection, or any application where failure could injure someone.
If you want the cultural background and traditional decorative role rather than the material adaptation, see the Chinese button knot meaning guide.
Diagnose the result by what you can see
The knot is flat instead of round. The outer turns were probably tightened before slack left the center, or the sheath was flattened after core removal. Open the knot slightly and dress it in smaller circuits.
One lobe is larger. Trace the strand leaving that lobe. There is usually a neighboring segment that has not passed its slack forward. Correct that segment instead of pulling the opposite tail harder.
The center looks crossed or pinched. Stop and compare the over-under path with the loose setup. A wrong crossing cannot be fixed by tightening.
The button is too large for the loop. Change diameter or construction. Repeatedly crushing the same knot will not turn thick cord into a smaller material.
The tails creep after handling. Re-dress the final circuit and test the knot in its intended decorative context. If the application needs a rated or permanent connection, choose a purpose-designed closure instead of relying on this ornamental knot.
Quick reference: make one sample before cutting project cord
- Measure the opening, hardware, or loop the finished button must fit.
- Record the actual cord diameter and whether the core remains in place.
- Tie the whole path loosely and verify every crossing.
- Move slack around the knot in two or more small circuits.
- Compare the finished sample with the real object.
- Keep the project decorative and non-load-bearing.
This six-step sample test answers the material question cheaply. It also gives you a useful cord-length estimate without pretending that one measurement works for every brand, diameter, or button-knot variation.
FAQ
Is 550 paracord too thick for a button knot?
Not always, but it creates a large button. It suits chunky lanyards and toggles better than small garment loops. Tie one sample and test the finished diameter against the actual opening.
Should I remove the inner strands first?
Only if you deliberately want a flatter, softer result. Removing the core changes the knot's size and shape, so do not switch between cored and gutted cord mid-project. Make a separate sample for each construction.
Why does my paracord button knot look uneven?
The most common causes are a hidden path error, trapped slack, or pulling both tails before the inner segments have been dressed. Reopen the knot enough to trace the route, then feed slack through neighboring crossings in sequence.
Can I melt the cord ends next to the finished knot?
Synthetic paracord ends are often heat-finished, but molten nylon can burn skin and damage the finished knot. Work in ventilation, keep heat away from the knot body and flammable materials, and follow the cord maker's instructions. Mechanical trimming and an appropriate end treatment may be safer for some projects.
Can this knot hold a person's weight?
No. This page describes a decorative craft knot, not a rated life-safety system. Use certified equipment, approved knots, and qualified instruction for climbing, rescue, lifting, or fall protection.
References
- Chinese Knotting: Chinese Button Knot—Spiral Method for the named variation, Carrick Bend stage, center-diamond route, and staged tightening landmarks.
- Atwood Rope guide to paracord sizes and types for example diameters and core counts.
- Atwood Rope overview of paracord construction for the core-and-sheath description.
- Samson Rope safety statement for the warning that knots can significantly reduce rope strength.